C'est la Vie is a 1966 Charlie Morgan 34.

Her home port is Everglades City, FL. Our typical cruising area is Southwest Florida, the Florida Keys, the Southeastern Atlantic Seaboard, and the Bahamas. We are C'est la Vie's third owners and purchased her in 2005. We continue to maintain and update this classic vessel. Please post any questions or comments about C'est la Vie or our travels via the comment links below.


Friday, April 12, 2013

Juggling Projects and Watching the Weather

The stable weather of the last week has eroded over the past 48 hours.  While we have only had one thunderstorm roll through the outlook has slowed our progress on repainting the deck.  

Anne cleaning tools after adding fairing filler to the cabin top.
 We did complete adding fairing filler to areas on the cabin trunk this afternoon.  Weather permitting tomorrow we will unleash the sanders.  We hope to have the area ready for primer by Monday.

The gallows cross piece now 3 coats of epoxy & 6 coats of Bristol Finish applied.
I continue to build up the finish on the boom gallows cross piece and other bits of bright work.  I'm going for 3 coats of epoxy and 8 coats of bristol finish on the cross piece.  At my current pace it should be ready to re-install on Sunday.  

Six coats of finish and a shiny hinge doth a rejuvenated  table make.
I also completed refinishing our table and installed a new hinge.  

Progress, Progress, Progress...

Thursday, April 11, 2013

A Very Filling Day

Anne taping off areas to be filled.  I followed behind with thicken epoxy. 
Yesterday we teamed up to filled the areas ground out on the cabin trunk.  In the morning we applied epoxy thicken to the consistency of mayo to fill.  The day was warm, windy, and sunny so the epoxy cured quickly.  Late in the  afternoon I returned and used an orbital sander with 80 grit paper to fair out the epoxy.

C'est la Vie in leopard print/
What did I do with ilde hands at midday?   Brightwork of course....


Tuesday, April 9, 2013

More holes to fill in the cabin trunk

The application of a second coat of epoxy to the gallows wooden crosspiece began the day.

Two coats of epoxy on the gallows.
My plan is to build up three coats of West Systems Epoxy to seal the wood and then add 6 to 8 coats of Bristol Finish for the UV Protection.

Anne joined me for an afternoon of finding and grinding out small voids in the cabin trunk.  These voids, primarily found in the fiberglass layer below the gelcoat, date back to the original construction and are caused by a failure to completely fill the mold with epoxy.  Fast forward 47 years and these voids, the largest the size of a small pea, are causing the ordinal blue gelcoat layer and the paint applied in 1997 to crack. 

Anne uses an awl to identify in mark voids.  I used the grinder to open them up.
Today we expose the voids.  Tomorrow, weather permitting, we will fill the voids with thicken epoxy.


The number of voids we discovered was surprising, but better to fix them now than be forced to go in after our new paint has dried.  Fortunately the vast majority of the voids are on areas to which we plan to apply Kiwi Grip Non-Skid. This will make the task of fairing the area much easier.

More images from this project can be found in - Painting Cabin Trunk - Spring 2013

Hope the weather holds...

Monday, April 8, 2013

Filling Holes in the Cabin Top (a.k.a. dig a hole then fill it up.)

Today was devoted to filling holes in the cabin top.  Most were small holes used for fastening the dodger, the turtle, and the handrails to the cabin.  


never realized the cabin roof had so many holes.
I drilled the partial depth holes out to 1/4" diameter.  Holes for fasteners that may receive great stress loads (i.e. dodger frame, turtle, and handrails) I expanded to 1/2" and drilled through to the interior of the boat. This will allow us to through bolt and install backing plates on critical hardware. 


the interior view . ready for epoxy
All this drilling made a horrible mess of both the interior and the topsides of C'est la Vie.  The shop vac and I teamed up to clear away fiberglass and wood core.  Next I sealed the interior holes with tape.  Using a syringe and thicken epoxy I filled all the holes.  After painting the topsides we will come back and redrill the holes for the hardware. Drilling through the over sized epoxy plug will prevent water from ever reaching the wooden core of the cabin top.

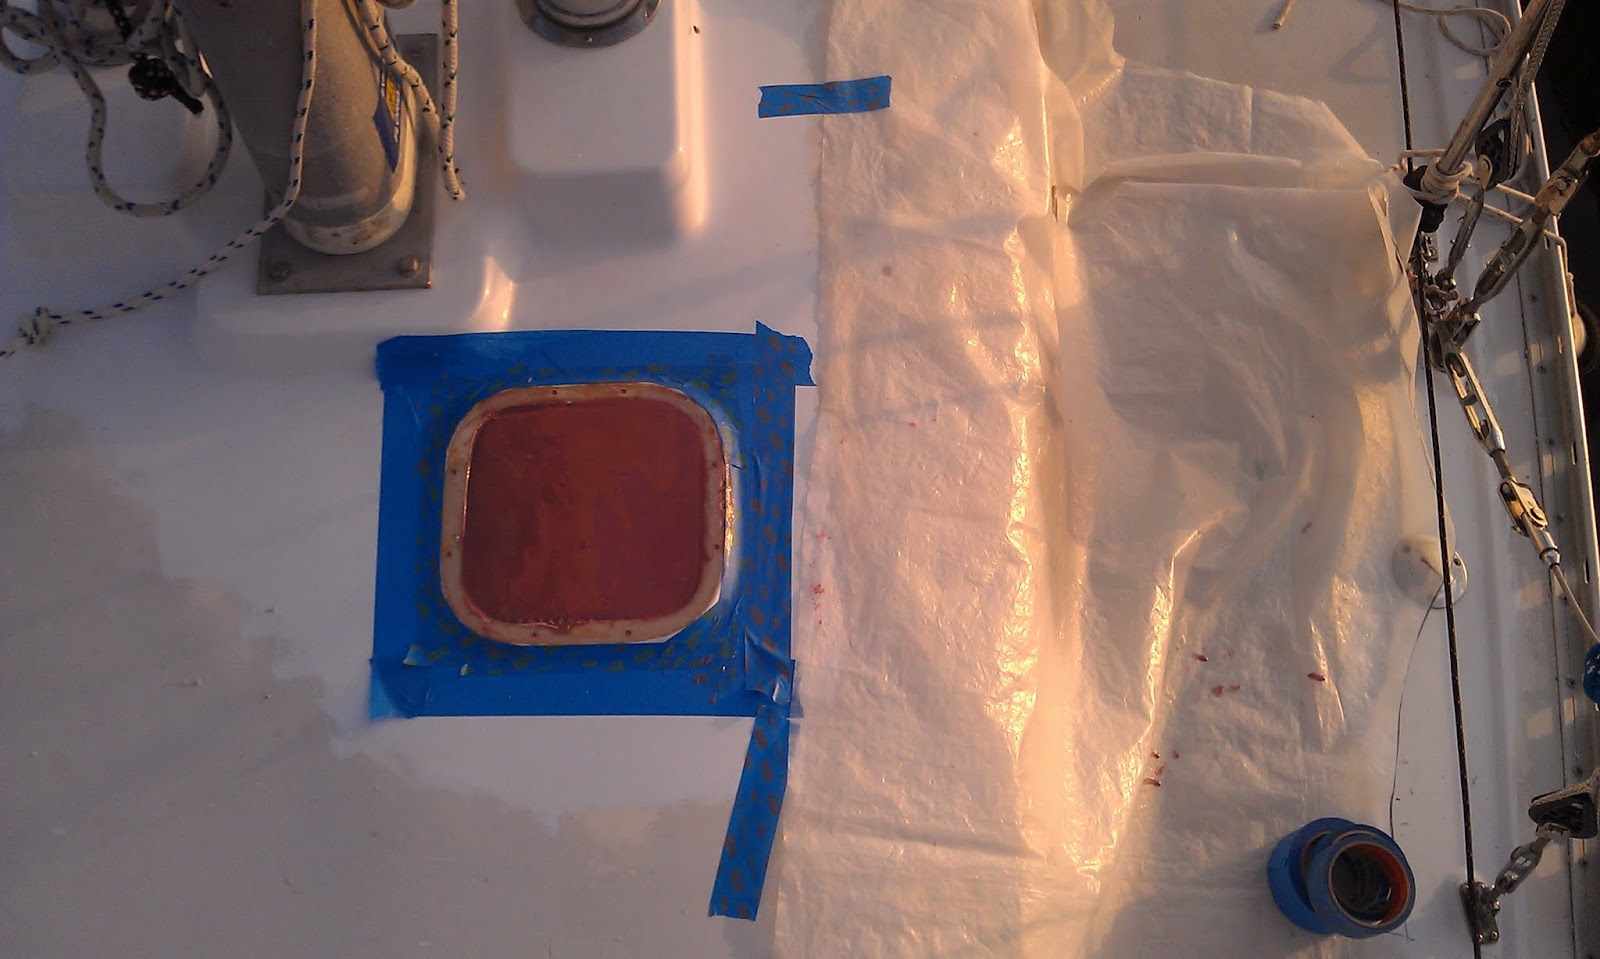
The other hole in the cabin top took a bit more effort to fill.


The broken and leaking hatch in the head must go.
C'est la Vie's small head hatch was added by her second owner.  The additional light and ventilation are beneficial.  A few years ago the hatch began to leak around the frame.  Last summer, while loading the dinghy on deck we broke the hinge on the hatch.  Now we have opted to replace the hatch with a Nicro 2000 Solar powered vent fan.

Fortunately the screws retreated easily from the deck and frame.  Unfortunately the hatch was bedded with 5200 and refused to let go.

the proper tools for removing 5200.
The 5200 succumb to a heat gun, a scraper, and a hammer.  I then sanded down the area to remove the remaining 5200 and created another giant mess inside the boat... shop vac to the rescue.

Using clear plastic sheeting I created a template for the outside dimensions (OD) and the inside dimensions (ID) of the opening.


creating templates for material to fill and cover the opening.
I plan to use sea teak for the exterior material. So the OD dimensions were transferred to the material. 


 the fan will rest upon sea teak on the topsides
Fortunately I have some scrap teak to use for the deck plug and interior material.   Fitting the teak plug took a few trips between the hole and the sander, but patience paid off in a snug fit.  


the teak plug will be visible from below decks.
When flush with the interior cabin ceiling the 3/4" thick teak plug did not fill the entire depth of the deck.  One layer of  3/8" Plascore brought the plug nearly flush with the deck.  I filled the remaining voids with thicken epoxy.


Now we await for the epoxy to cure.  Addition photos of this project are available in the photo album titled -  Solar Vent Fan Install - Spring 2013.

Sunday, April 7, 2013

Stripped Down Into Full Project Mode

Today we stripped down the decks and cockpit area in preparation for two projects

C'est la Vie looking a bit naked with her deck hardware, turtle, dodger, gallows, and bimini gone.
The dodger, turtle, cabin handrails, and deck hardware succumb to the need to paint the cabin trunk.  Our plan is to refinish the cabin top and sides down to the non-skid on deck.  We will address the decks out to the toe rails and the cockpit later this year.   We created a photo album to document this project... Paint Cabin Trunk - Spring 2013 

turtle and trim off the cabin top
The more we can clear off the decks the easier the job and the better the finish.  Clearing deck fittings and hardware also gives us a good excuse to make some additional improvements - refinishing wood trim, replacing the broken head hatch with a solar vent, properly attaching the handrails with through bolts, and properly bedding every screw or bolt that enters the deck.

Meanwhile back in the cockpit, we removed the bimini and gallows crosspiece in preparation for installing two 80W solar panels.

test fitting the panels to figure out the best position.
The addition of a photo-voltaic (PV) system to C'est la Vie has long resided on our wish list.  Thanks to Ben V., an friend and co-worker who's previous profession was solar installations, for providing the expertise to jump start this project.  We ordered two Sunmodule 80W panels and a BlueSky Solar Boost 2000E charge controller from altE. The size of the panels was a compromise between energy production and mounting space.  I'm certain many cruisers are faced with the same delimia... want / need bigger panels, but lack suitable mounting options.

We created a photo album to document the PV project... Solar Power - Spring 2013

We will continue to add photos to the albums and updates here on the blog as our projects evolve.


Saturday, April 6, 2013

Sewing new bug screens for hatches

Our existing hatch screens, made by Anne over 7 years ago, grew threadbare.  So now it is my turn to sew the hatch screens.  

With all the Outward Bound Staff departed we utilize the large spaces in the Sunset Island Lodge as work areas. 


The west end of the dining room converted to sewing loft.
 Having ample space to lay out projects is incredibly helpful.  For this endeavor a portion of the dining room became the sewing loft and the salon floor a space to draft out patterns.  

I utilized plastic sheeting for the pattern material.  Patterns represent the "no-see-um" screen portions of the hatch covers.  Due to it's light weight I find the screen difficult to work with so patterns assist with the layout and cutting. 


Basic geometry - a framing square, a straight edges, a 3' piece of string, and a tape measure were used to create the patterns.    
Fortunately C'est la Vie's two hatches are square.  The center hatch frame measures 22" x 22".  To leave ample room for operating the hatch, I created the pattern based on a 24" square.  The forward hatch measured 20" x 20" thus I used 22" for the pattern.  

Each hatch screen consists of two panels of "no-see-um" material.  The curved section wraps around to form the sides and back of the cover.  The rectangular  section follows the arc of the leading edge of the hatch as it moves from a close to open position.
   
Two patterns - the upper two panels are for the smaller forward hatch,  The larger patterns in the fore ground are for the  center hatch.
I use two sided tape to join and test the patterns.  Satisfied with the fit, the patterns are laid atop the screen and weighted down to hold the pattern and fabric stationary and wrinkle free while cutting. 

Ready to cut the screen.   Battens, straight edges, and a square are used to hold the fabric &  pattern stationary while cutting.
Attempting to cut clean edges on the screen is futile.  I hide all the edges of the screen in the finish product.  

For joining the screen sections prior to sewing, I use two sided basting tape (I gave up on pins a long time ago.)


joining the two screen sections with basting tape.
The screen material is too flimsy to securely hold stitches.  My solution is to use 1" nylon webbing as binding tape on the screen to screen seams.  This method has the added benefit of hiding those rough edges on the screen.


finally time to begin sewing.

We own a Sailrite LZ-1 and purchased a 1" binding tape attachment along with the machine.  This attachment is a must have in my opinion. Similar attachments are available for most machines.  

To more easily differentiate between to hatch screens, I used yellow binding tape on the center hatch and blue tape on the forward hatch. 


filling tubular webbing with lead cast net weights.
Tubular webbing filled with lead cast net weights serves as the ballast in base of the hatch screen. The lower edge of the screen and the weighted webbing are hidden inside a Sunbrella base.


the long sunbrella base sections.  
Since the sunbrella is a heavy fabric and the base sections are simple in shape, I did not create patterns for these pieces.   

Sewing base proved more complex than I originally speculated. Initially the two sections of the sunbrella base were sewn onto each side of the screen (i.e. interior & exterior.)   Next I tacked one end of the weighted tube onto the sunbrella base.  Finally I joined the two bottom edges of the base.


test fitting the final product.
Can't say I'm eager for a buggy night at anchor, but at least we are a bit more prepared.

More images from this project are available in the Hatch Screens - Spring 2013 photo album.  


Friday, April 5, 2013

Inflatable Dinghy

Our first dinghy, an 8 foot Port-A-Boat we called Origamy, served us well. 


Origami beached on Carrot Island with C'est la Vie in background - Beaufort, NC
After 7 years of faithful service the only alarming signs of wear were her seats splitting at the seams.  She towed well and stowed well on the starboard side along the rail.  

Origami stowed on C'est la Vie's starboard rail - Key West, FL
We retired her in spring 2012 after I completed the re-build / conversion of a 8 foot wooden sailing pram into a rowing dinghy - Dinghy Rebuild .  

Segundo - awaiting her first launch - Sunset Island, FL
We christened her Segundo.  She is a looker and we received many compliments on her.  We transported Segundo on the forward deck. 
C'est la Vie with Segundo on deck motor south in the ICW just off the Fort Pierce City Marina, FL.
Stowing a dinghy forward had the added benefit of serving as a fantastic hatch cover but added noticeable weight and windage to the bow. Did I mention weight?  When refitting Segundo I focused more on durability than weight.  Her 7'10' hull weights approximately 80 pounds. Ultimately her beauty could not overcome her foibles.  She proved to be a wet ride under power and towed poorly. 

For our next dinghy we decided to experiment with an inflatable.  Size and weight considerations eliminated the popular Rigid Inflatable Boat (RIB) designs.  That left us three options... aluminum roll up floor, wood slats floor, or inflatable floor.  This time around we elected to prioritize weight over durability and purchased the West Marine HP-275.   
Our yet un-named inflatable dinghy.
The HP-275's  high pressure floor (11 psi in floor vs. 3.6 psi in tubes) is identical to an inflatable stand up board. Having experienced the performance and durability of Anne's inflatable board boosted our confidence in this construction.  Thanks to the inflatable floor the HP-275 provides more carrying capacity and more free-board than her aluminum or wood slat brethren. She weighs in at  a svelte 63 lbs.  

We will experiment with various options for transporting the dinghy, but my guess is that for multi-day crossings she be deflated and go below; offshore hops she be stowed at the bow; and for daily travels inshore we will tow.  I plan to rig a bridle system for storing her out of the water along side C'est la Vie at night.

Does anyone out there have recommendations or diagrams for creating towing bridles or bridles for using a halyard to lift the dinghy out of the water for nightly storage? 


Thursday, April 4, 2013

The winds of change are upon us...

Thunder from the spring's first afternoon thunderstorm rolling across Chokoloskee Bay signals a change in the seasons.  The absence of staff here on Sunset Island signals the end of our winter work with the Outward Bound School.
Afternoon thunderstorms rolling across Chokoloskee Bay
Now that Anne and I have the island and some time to ourselves we plan to dive headlong into awaiting boat projects.  

Items on the list include...

  1. Purchase new dinghy
  2. Complete install of new GPS
  3. Sew new bug screens for hatches.
  4. Complete refinishing the interior wood.
  5. Refinish exterior wood.
  6. Install new cabin sole.
  7. Install solar system
  8. Install new lower bow running lights
  9. Replace broken hatch with new solar vent fan in head
  10. Reseal starboard salon window
  11. Paint Cabin trunk
  12. Kiwi Grip on top of cabin trunk
We hope to have the projects completed and all our personal items moved off Sunset Island in time to depart for the Bahamas by mid May.   Now lets get busy.