C'est la Vie is a 1966 Charlie Morgan 34.

Her home port is Everglades City, FL. Our typical cruising area is Southwest Florida, the Florida Keys, the Southeastern Atlantic Seaboard, and the Bahamas. We are C'est la Vie's third owners and purchased her in 2005. We continue to maintain and update this classic vessel. Please post any questions or comments about C'est la Vie or our travels via the comment links below.


Saturday, June 12, 2010

Back to the cockpit lockers

With the paint dried and the wiring installed, we turned our focus back to the cockpit lockers.  We decided to leave the port side locker as is, but add a "floor" to the starboard side locker.  Below is an image of the locker...
The black hose on left attaches to our secondary, large capacity bilge pump.  The pump visible in the lower left of the frame is our primary, small capacity bilge pump.  The bilge on our Morgan is very inaccessible so placing the filter and pump mid-line in this hatch allows the filter to be cleaned and the pump to be serviced easily. Typically in this locker we place winch handles, snatch blocks, boom vang, etc. in milk crates.  The milk crates inevitably slide down an rest against the pump & filter.  Hence the desire for a floor.  In the image above I have already added nail strips along the forward bulkhead and the midships bulkhead (these are the white strips and made from seateak.)

Cardboard was used to create a template for the floor...
Once the fit was correct the cardboard template was transfered to 1/2 marine plywood and the  floor was rough cut.  I added a hatch in the center to provide access to the filter and the bilge pump.  Below are all the pieces of the assembly...
As of this evening the pieces were assembled and the non-visible side of the floor was finished with 3 coats of epoxy...
Since this project will not be exposed to sunlight/UV we simply used west epoxy with the fast cure hardener.  This allowed us to glue up the assembly and get a few coats of finish on in a matter of hours.  Most epoxy is not UV stable so projects or parts that will be exposed to consistent sunlight must be finished with an appropriate product (i.e. varnish or Bristol Finish).  Tomorrow we will complete this project by applying 3 to 4 coats of epoxy to the topside of the floor.

Wednesday, June 9, 2010

Elbow deep in the electrical panel

My research into NMEA0183 and our various devices on board yielded mixed results.  Internet searching over my morning coffee lead to Actisense's guide to NMEA0183   I found this document super helpful and would encourage others working with NMEA0183 to check it out.  I'm guessing Actisense also has a NMEA2000 guide as well.

Completely caffeinated and not completely understanding everything I now knew, I proceeded out to C'est la Vie to finalize the installation of the network block ...
The image above is of the completed installation.  The installation was straight forward once I figured out the coding of the wires on the various devices. The Raymarine Tiller Pilot and the handheld VHF are receiving data from the Garmin 492GPS, but the Icom422 refuses to listen.  Does anyone out there have experience with this issue?  My next step is to post this same question on some marine chat boards.

While installating the block, I also worked to organize and streamline the wiring in the electrical panel.  This turned into more of a project that the network block and left me elbow deep in the electrical panel until sunset.  Below is an image of the results of my efforts...
Compared to the before image posted on June 8th there are only subtle visual differences.  The greatest differences are what you don't see.  Gone are a number of unused coaxial cables. The wires in the upper and lower sections of the box are now bound together and secured via zip ties to the box.  Finally, I'm waging an ongoing campaign to label all the various breakers and buses and made great strides on this goal.

Hopefully with all of todays efforts the electrical panel can stay closed for awhile...
At least until someone provides an answer to the VHF/GPS communication question.

Tuesday, June 8, 2010

NMEA IN and NMEA OUT

After a day of plumbing yesterday, we are on to a day of wiring today.  We started by running new wire between the electrical panel and the new tiller pilot at the stern of the C'est la Vie. Then on to disconnecting the GPS and pulling those wires into the electrical panel.  The inside of the electrical panel is pictured below.
With all the wiring lead to the panel, we then installed the new network block that I discussed in the May 29th post.  The network block is the green and grey rectangle in the upper right the electrical panel pictured above.

When we correctly connect the GPS, autopilot, VHFs together in the block they should all communicate using the language known as NMEA 0183.  The conversation is a bit one sided as NMEA 0183 will allow the GPS to talk while the other devices listen.  Sound simple enough?  Well figuring out which wires to link together from each device and tracking down all the various wires is requiring some additional research...
GASP!... that is right we are actually reading the manuals.  I sure hope this works...

Monday, June 7, 2010

Running hot & cold...


Today was pluming day aboard C'est la Vie.  A faulty accumulator tank provided the impetus to rebuild the pressurized water system.  The spigots above, located in the portside cockpit locker attach to our shower head.  Years ago we gave up on the shower below decks... not enough room, everything got wet, water had to be pumped from the shower pan, etc.   If you own or travel on a older boat, then I'm sure you are familiar with the issues that drove us to simply rip the shower nozzel and accompanying plumbing out of the head.  The cockpit makes a great shower stall with the only issue being privacy in busy anchorages.

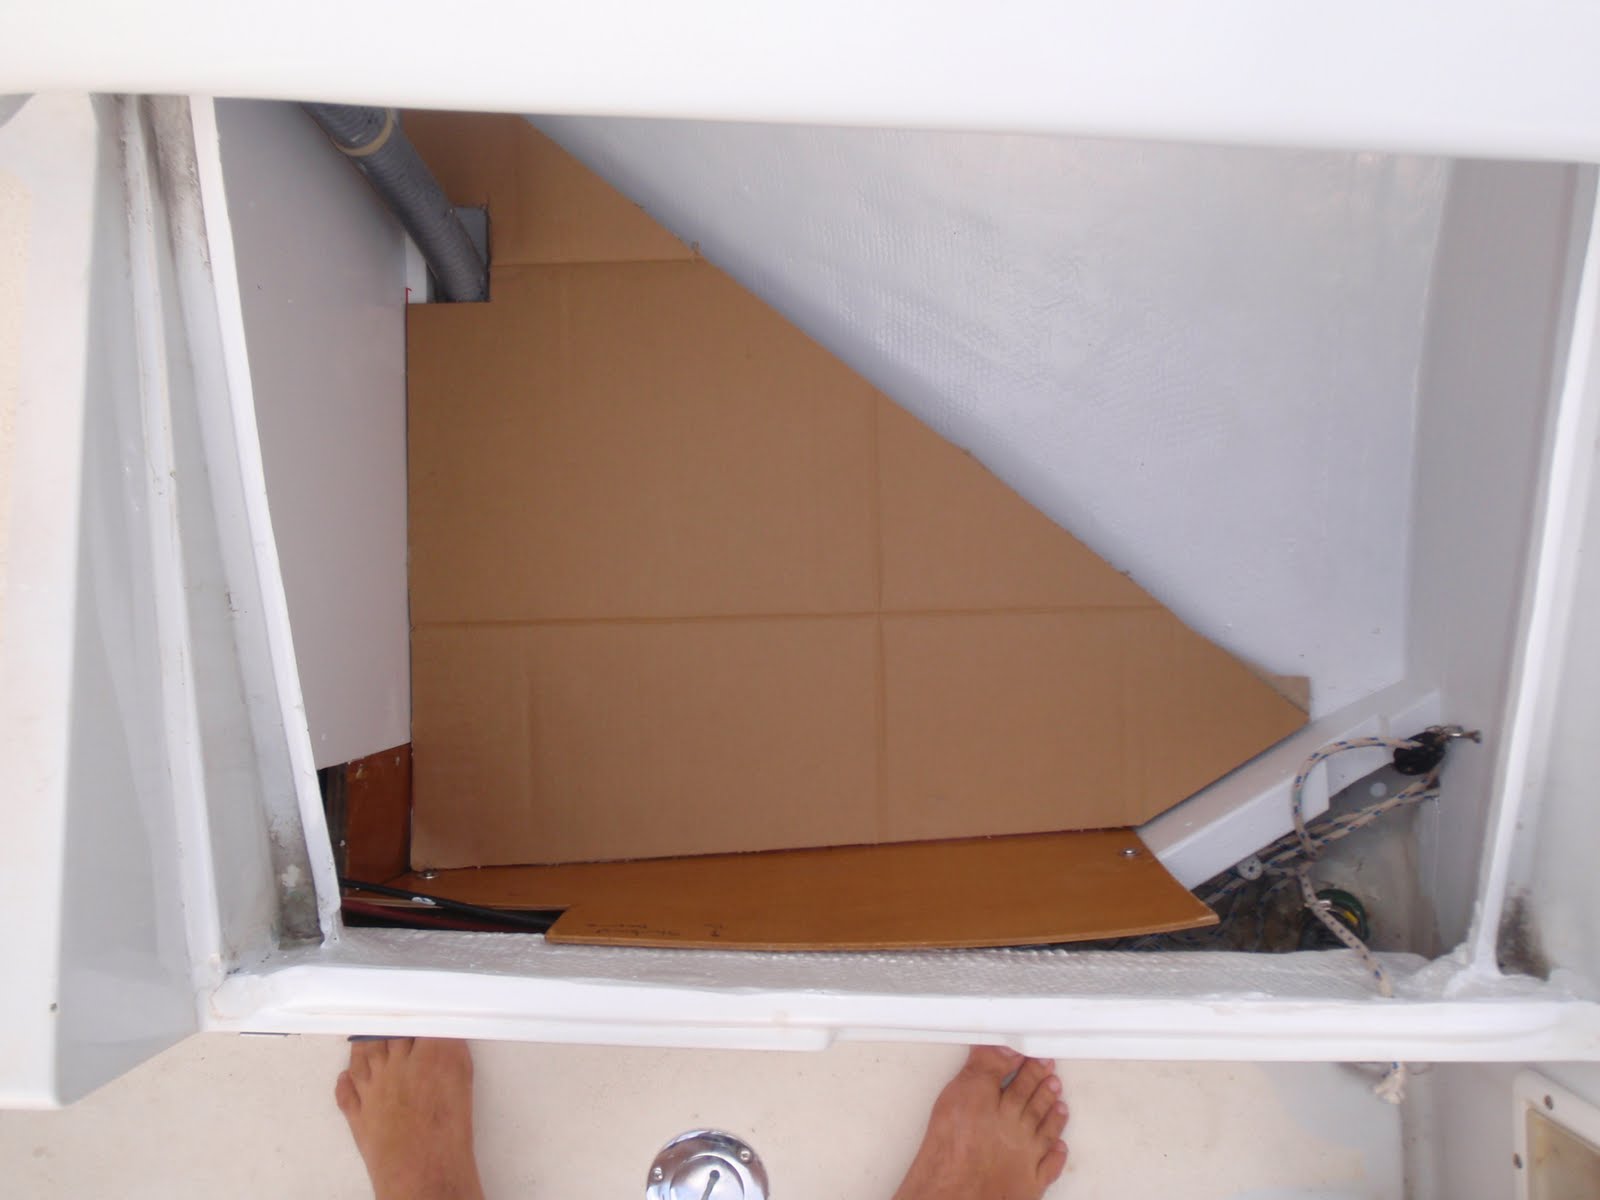
Forward of the bulkhead pictured above lies the guts of our plumbing system.  Originally the area was the port side quarterberth, but the previous owner, who did an amazing refit in the 1990's, closed off the area when he expanded the galley and used a large portion of the quaterberth for the fridge, hot water heater, and plumbing system.  The image below is shot by crawling into the port cockpit locker and looking forward through the small cut out visible at left in the image above.
I post this image with some hesitation.  It feels a bit like voyeurism. Boat publications only illustrate the shiny side of things and here I am revealing C'est la Vie's dirty bits (pause now and share continued hesitation on the author's behalf.) Across the top of the image is the galley counter top. Below the counter top the grey box is our hot water heater.  Underway it uses heat from the engine's cooling system to heat up the water.  When connected to shore power, a rarity, it can use electricity to heat the water.  To the extreme upper left is the edge of our SeaFrost refrigeration system. The Seafrost system is definitely power hungry and the largest consumer of battery power on board, but it has proven to be a reliable system that can deliver ice on a summer day in the Exumas.  Back to the plumbing... the black pump at the bottom right is the heart of the pressurized water system.  I replaced the old pressure pump with a new Jabsco Par-Max 3 pump.  The new pump does not require a accumulator tank and is significantly lighter weight than the old unit.  At 3 gallons per minute (gpm)  the pump is the same capacity as the old pump and seems to deliver plenty of pressure.  Our pressure outlets are limited to the cockpit shower, a sink faucet, and a water filter system for potable water. As part of the project I also replaced all the hoses in the system.  To round out the tour, the hatch to the right in the image is one of three access doors to the engine.

On the shiny side of things, here is the same area as viewed from the cabin...
 Looks a bit better from this angle.  When underway we use the area to store our storm sails.

Sunday, June 6, 2010

Pink and Blue - Painting and Sewing

Recently,Anne and I read and discussed a number of posts on the Women and Cruising blog about how responsibilities among partners for the tasks aboard a boat are delegated.  Who assumes the traditional male or "blue" tasks and who assumes the traditional female or "pink" tasks.  The blog posts have provided a launching pad for conversations about how our responsibilities aboard C'est la Vie and ashore are divided.  Admittedly through our 10+ year relationship we have grown into accepting fairly traditional pink & blue responsibilities in our life ashore and cruising.  I'm not going to pass judgement or make any moral statements about our's or any other crew's system of delegating responsibilities.  I chose to begin this blog entry with these observations because on today's projects Anne and I reversed the the pink and blue roles.

I spent the day at the sewing machine.
In the image above I am working on a cover for the rail mounted grill that can be seen behind me to the left. In addition to making the grill cover, I finally completed the aft end of the mainsail boot (a project I started last fall.)  I used a green sunbrella to make identifying the end of the cover more easy and to add a bit of color to C'est la Vie's topsides.

Anne applied the second coat of primer and first top coat to the cockpit lockers...
and the port side salon locker/bench...
What a difference a couple coats of paint can make!  See June 4th & 5th post for some before images of this area.